
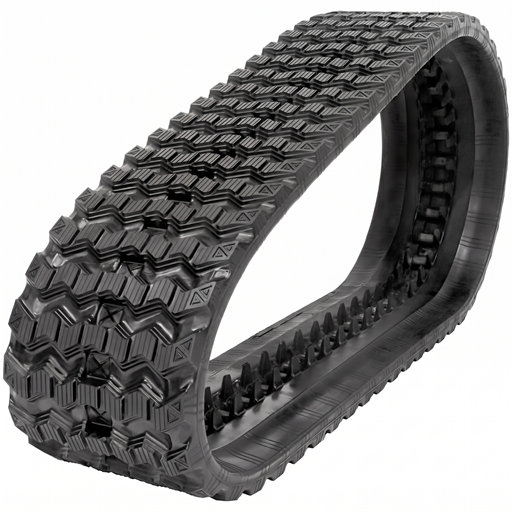
This is a general, instructive guide to how the system works and what to look for. It is not a service manual, and it is not specific to your machine. Correct tensions, acceptable wear limits and approved sizes are set per machine by its manufacturer, and the manual for the machine you are actually working on is the only authority on what is correct for it. Work to that manual, and to your employer's safety procedures.
Rubber or steel
The choice between rubber and steel tracks depends on the terrain and on what the machine is being asked to do. Rubber gives a smooth ride and protects the surface it drives on, but wears faster in extreme conditions. Steel excels in rough terrain, at the cost of surface-friendliness and operator comfort.
| Rubber tracks | Steel tracks | |
|---|---|---|
| Surfaces | Gentle, leave hardly any marks. Suit urban work, landscaping and delicate surfaces | Harsh on asphalt and lawns, and can damage them |
| Ground pressure | Spread the weight more evenly, so less risk of sinking on soft ground | A solid base gives more stability, and less risk of getting stuck or losing balance on mud or uneven ground |
| Traction | Less on very rough terrain, and harder going on wet or muddy surfaces | Excellent, including rocky ground and steep muddy slopes |
| Durability | Wear faster in highly abrasive conditions, and are more easily damaged or torn by sharp objects and uneven ground | Highly durable. Withstand the harshest conditions and resist damage from sharp objects and debris |
| Lifespan | Shorter | Longer when properly maintained, especially in harsh environments |
| Operator comfort | Flexible, so a smoother ride with less vibration | Rigid, so more vibration and jolting through the day |
| Noise | Quieter than other track types — useful in urban or noise-sensitive settings | Noisier on hard surfaces, which is a problem in residential areas |
| Maintenance | Routine work still needed, but usually less intensive | More regular attention, including lubrication and tension adjustment |
Rubber pads: the middle option
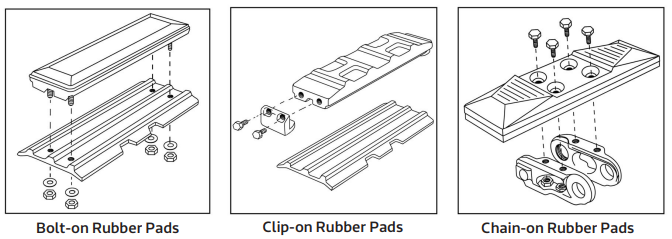
If you want to keep the benefits of steel tracks and gain surface protection, rubber pads are the compromise. They are track shoe covers made from durable rubber, and fitting them to steel tracks is straightforward. There are three mounting types.
- Bolt-on
- Pads mounted directly onto the steel track. Durable and cost-effective.
- Clip-on
- Pads slide sideways onto the steel plates and are secured with brackets. More rubber and more weight, which minimizes wear and makes them more durable.
- Chain-on
- The steel plates come off before the pads go on. The rubber then surrounds the steel part of the track, which minimizes the risk of damaging the surface.
The four signs a rubber track needs replacing
1. Constant loss of tension
It is normal for a track to stretch and lose tension over time. With too little tension, though, a track can easily come off, which is why tension is worth checking every day.
If you find yourself constantly losing tension, the answer is not to tighten beyond the tension prescribed in the machine's manual. Too much tension damages the track and accelerates the wear you are trying to slow down.
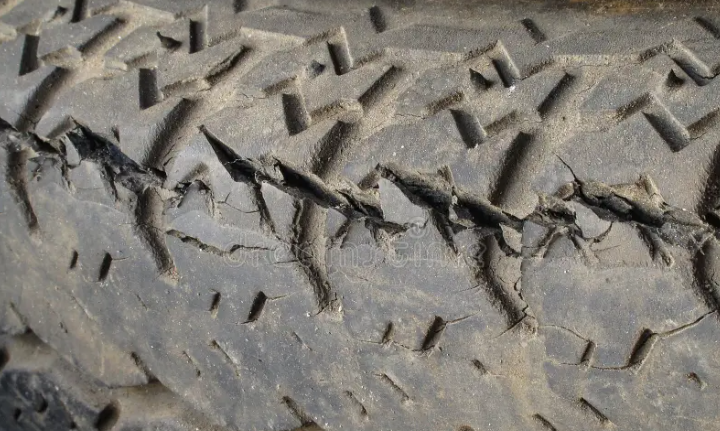
2. Cracked tracks
Look for cracks in the rubber as part of the daily inspection. Cracking is inevitable eventually, but it is worth ordering replacements as soon as you see it: cracks and cuts let corrosion start on the steel belts and links inside the track, which brings the failure forward.
Cracks appear more quickly if the machine is operated incorrectly, or if it constantly works on rough terrain.
3. Slipping tracks
If a track slips over the sprocket wheels there are two possible causes: the track has stretched and is now too loose, or the sprockets are worn out. Either way it needs dealing with, because a slipping track will come off repeatedly, and it can end with the metal links being pushed out through the rubber.
4. Visible metal links
If the undercarriage is too dirty, accumulated dirt can push the metal links out of the rubber. When that happens, replace the tracks and the undercarriage parts immediately. Better still, prevent it by clearing the tracks and undercarriage daily.
How long a rubber track lasts
It depends heavily on how well the track is maintained. The range runs from about 400 to 2,000 working hours, with an average life of 1,200 to 1,600 hours. That spread is wide enough to be worth taking seriously: the difference between the bottom and the top of it is largely maintenance.
Getting more life out of a track
Operate the machine properly
The most obvious factor and the largest. An operator who has been properly trained will get significantly more life out of a set of tracks, and two habits matter in particular:
- Watch the sidewall of the track so it does not rub against hard surfaces.
- Avoid sharp turns, and avoid turning too quickly.
Be careful on hazardous surfaces
Tracks will drive over sharp surfaces, but that does not make it advisable. Sharp surfaces always carry the risk of puncturing a track or damaging it another way, so avoid them where you can.
Park somewhere safe
At the end of the day, park where the machine is protected from sun and rain. Heat from the sun causes cracks in the rubber, and rain corrodes the internal metal parts. Never park where there are traces of oil or grease, either — both have an aging effect on rubber.
Inspect regularly
Check the tracks and the undercarriage parts for wear. Worn rollers, idlers and sprockets all pull down the performance and productivity of the machine.
When you replace the tracks on a machine, you will need to replace certain undercarriage parts as well. Undercarriage parts wear out together with the tracks, so budgeting for a track on its own tends to be budgeting for half the job.
Keep track of tension
Beyond a general inspection, check the tension regularly, because correct tension is what stops a track slipping.
- The correct tension is in the machine's manual.
- If there is too little tension, add grease to the tensioner grease cylinder.
- If the tensioner is fully extended, the track has reached the end of its adjustment and it is time to replace it.
- Never add too much tension. It causes damage.
Keep it clean
Tracks perform better free of waste and soil, so clean them regularly with water. Check for oil and grease on them while you are cleaning.
Reading and measuring the size
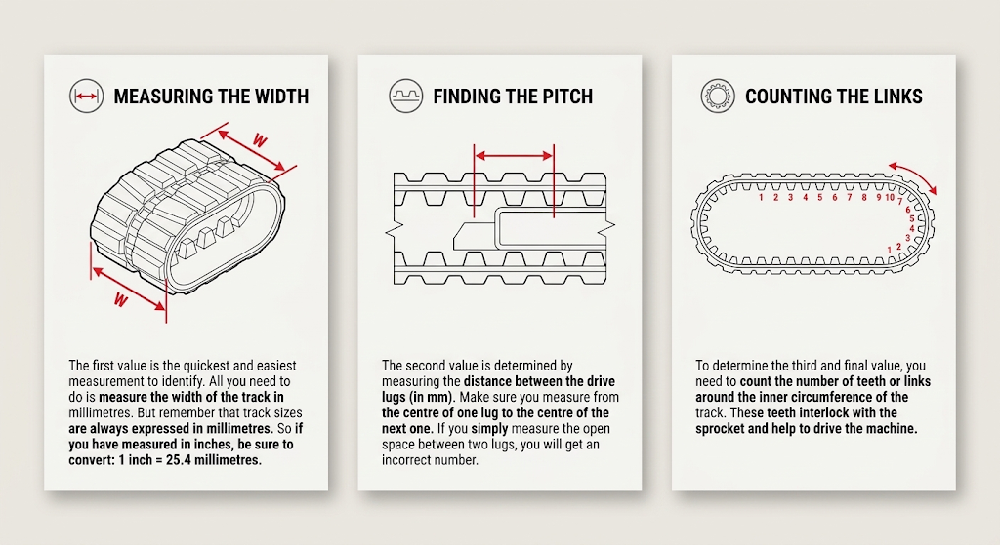
A rubber track size is three values, always in the same order.
- Width
- The width of the track, in millimeters.
- Pitch
- The distance between the drive lugs, in millimeters, measured center to center.
- Links
- The number of teeth or links inside the track. These interlock with the sprocket and drive the machine.
So a track marked 180x72x38 is 180 mm wide, has 72 mm between lug centers, and has 38 links.
The size is usually stamped inside the track. But the stamp can wear away and become illegible, which is exactly what tends to have happened on a track that needs replacing — so it is worth knowing how to measure the size yourself.
Width
The quickest and easiest of the three to identify: measure the width of the track in millimeters.
If you have measured in inches, convert before ordering. One inch is 25.4 millimeters.
Pitch
Measured from the center of one lug to the center of the next. If you measure the open space between two lugs instead, you will get an incorrect number.
Links
Count the number of teeth or links around the inner circumference of the track.
Replacing a rubber track
Ten steps, and the two machine types diverge at several of them.
1. Be well prepared
Everything depends on preparation. Give yourself plenty of workspace to maneuver around the machine, clear away clutter and obstacles, and put the machine on a flat surface free of debris, dirt and dust.
Have a colleague nearby to help. Both of you in personal protective equipment: safety boots, safety glasses, gloves, ear protection and high-visibility vests. Next to the replacement parts, have to hand:
- The manual for the machine
- Sockets and a torque wrench
- Blocks of wood
- A metal bar
- Grease — check the manual for the type you need
If one is available, keep a forklift close by. Rubber tracks are heavy even when two people are lifting.
2. Lift the machine
A mini excavator with a blade is the easier case. Lower the blade until the front of the tracks is off the ground, then turn the arm towards the back and push down until the tracks are in the air.
Without a blade, turn the arm to the side of the machine and push down until the track is raised — which means one track at a time.
A compact track loader needs blocks of wood positioned firmly under the back of the machine. Tilt the bucket downwards and push down until the tracks are completely off the ground.
3. Empty the grease cylinder
The grease cylinder is what holds the track under tension, so emptying it releases that tension. Reach it through the inspection hatch on the undercarriage. Normally the idler moves into the undercarriage on its own as the grease is squeezed out.
On a machine with plenty of hours on it, dirt can leave the idler stuck. If it will not move, put a wooden block between the track and the sprocket and have your colleague start the machine and move the track slowly backwards. The block turns with the sprocket and pulls the idler into the undercarriage.
4. Remove the old track
Mini excavator. Once the idler is inside the undercarriage the track comes off readily. Lift it off the idler, then tilt it slightly to get it off the sprocket. Once it is free of both, move it out of the way with a forklift.
Compact track loader. Different, because even with the grease cylinder empty the track is still held by the sprocket and rear idler. Run it off with the metal bar: place the bar underneath the top of the track and have your colleague move the track backwards, which loosens it, then keep guiding the track off the sprocket and idler until it is clear.
5. Check the undercarriage parts
With the track off, the undercarriage is easy to inspect, and this is the moment to do it. The machine's manual gives the acceptable wear. If the idler or the upper and lower rollers are too far gone, replace them — leaving them will damage the machine.
6. Replace the sprocket
The sprocket and the track work as a unit and wear out together, so if one is on its last legs the other is too. Fit a new track to an old sprocket and the track wears out more and faster, and is very likely to come off.
Loosen all the sprocket bolts. If it is stubborn, a wooden block will help. With the sprocket off, clean the contact surfaces on the drive motor — rust and grease build up there and make the sprocket stick to the motor. Once everything is clean, put the new sprocket in position and tighten it with a torque wrench.
7. Install the new track
Before anything else, check the track is the right way round.
If the track has a V-shaped tread pattern, the V should point towards the front idler. Set up that way, the V points towards the sprocket along the run underneath the machine, which forces dirt and mud outward from under the machine as it moves and gives the machine more traction.
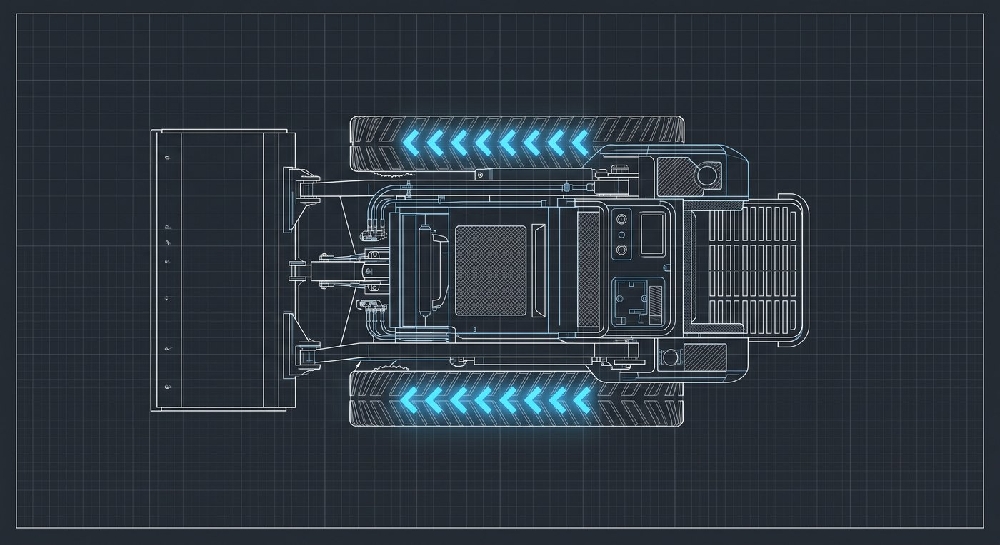
Mini excavator. With the track the right way round, place it on the sprocket and have your colleague pull the other side over the idler. Then use the metal bar to lift the hanging track over the frame of the undercarriage. The sprocket teeth have to run between the links of the track, which takes some fitting and adjusting.
Compact track loader. Lift the track on top of the sprocket first. Put it over the front idler, then use the metal bar to force it over the back idler. Keep the bar to hand to work the track links onto the sprocket teeth, switching between the back idler and the sprocket until the track sits correctly.
8. Refill the grease cylinder
With the track on, it has to be re-tensioned. Adding grease to the cylinder pushes the idler out and tightens the track. The required tension is in the machine's manual. Neither too loose nor too tight — both increase wear. Check it by measuring the distance between the bottom of the undercarriage and the inside of the track.
9. Check the new track
Move the track forwards and backwards to confirm the track and the undercarriage parts are properly installed. Check the tension again afterwards and adjust if needed. Finish by securing the inspection hatch tightly.
10. Replace the other track if necessary
Ideally you always replace both tracks and both sprockets.
For a compact track loader that is not really optional. These machines usually work in motion and put more pressure on the tracks, and a mismatched set makes fine finishing and grading almost impossible.
On a mini excavator you can get away with replacing one track and sprocket, because they commonly stand still while digging. It is still better to do both at once.
Frequently asked questions
My tracks keep losing tension. Should I just tighten them more?
No. Tracks stretch and lose tension as they age, and that is normal, but the answer is not to tighten past the tension prescribed in the machine's manual. Too much tension damages the track and accelerates wear. If the tensioner is fully extended, the track has run out of adjustment and needs replacing.
There are cracks in the rubber. How urgent is that?
Urgent enough to order replacements when you first notice them. Cracking is inevitable eventually, but cracks and cuts let corrosion reach the steel belts and links inside the track, and that brings failure forward. Cracks also appear faster if the machine is operated incorrectly or works constantly on rough ground.
The track is slipping over the sprocket. What causes that?
One of two things: the track has stretched and gone loose, or the sprockets are worn out. Do not leave it either way. A slipping track will come off repeatedly, and it can end with the metal links being pushed out through the rubber.
Do I have to replace the sprocket with the track?
You should. The sprocket and track work as a unit and wear out together, so if one is finished the other is close behind. A new track on a worn sprocket wears out more and faster and is very likely to come off the machine.
How long should a rubber track last?
Anywhere from about 400 to 2,000 working hours, averaging 1,200 to 1,600. Where a particular set lands in that range depends heavily on how well it has been maintained, so the spread is mostly under your control.
Which way round does the track go?
If it has a V-shaped tread, the V points towards the front idler. That way the V points towards the sprocket on the run underneath the machine, which pushes dirt and mud out from under it and improves traction.
Can I get rubber's surface protection without giving up steel tracks?
Yes, with rubber pads — track shoe covers in durable rubber that mount to steel tracks. Three types: bolt-on straight to the track, which is durable and cost-effective; chain-on, which needs the steel plates removed first and wraps the rubber around the steel; and clip-on, which slides on sideways and clips, carrying more rubber and more weight for better durability.
Before you order
- Check the stamp inside the track first. If it is still legible, that is the size.
- If it has worn away, measure all three: width, pitch center to center, and the link count.
- Convert to millimeters if you measured in inches, at 25.4 mm to the inch.
- Order the sprockets with the tracks. They wear as a unit.
- Budget for undercarriage parts too — idler, upper and lower rollers — because they wear out alongside the tracks. Inspect them with the track off and against the wear limits in the machine's manual.
- Order both sides for a compact track loader. A mismatched set makes fine finishing and grading almost impossible.
- Check what grease the machine needs before you start, since the manual specifies the type.
Send us the three numbers off the track, or your own measurements if the stamp has gone, along with the machine make and model, and we will confirm the size before you order. We can quote the sprockets and undercarriage parts at the same time.
This article is a general guide to choosing, maintaining and replacing rubber tracks. Correct tensions, acceptable wear limits and approved sizes are set per machine by its manufacturer. As above, work to the manual for your own machine, and never exceed the tension it prescribes.